Repetier-Server on RPi

logotext

Originally one of the issues (for me) of running a 3D printer is that it has to be connected to a PC in order to print. Desktop machines tend to be power hungry and over powered for sending a simple ASCII sequence over serial. More modern firmware allows for SD cards to be used and the printer to print ‘stand alone’. However most still need a PC in order to start the print. Not to mention you have to take the SD card out of the printer, plug it into your PC, transfer the file, take it out of your PC, plug it into your printer before you can even start. That last bit has to happen even if you are using a LCD screen and controller on your printer.

Two Printers

Two Printers

Enter Repetier-Server. Although designed to work with nearly any computer (Windows, Mac, Linux, young or old) I think it is a great use of a low power RaspberryPi. The Pi doesn’t take much power in itself and sending ASCII commands over a serial connection isn’t processor intensive.

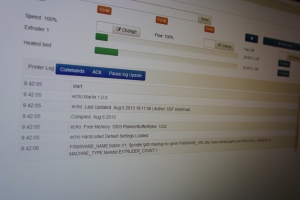
So what does R-Server offer over the more traditional SD card route? For me it enables easy access to the printer for sending files to print. Unlike using an SD card, R-Server has a web interface, meaning that any machine connected to the network can send a file to it. The current interface also adapts itself to the resolution it is displayed on, thus it works great on a tablet or phone. Another advantage is that while the printer is working, you can add more files to the queue. You still have manual control too, being able to move the printer as well as set temperatures etc. It also opens up the printer for more than one user, so for a work environment where several people need access, this facilitates an easier way to share the machine.

Manual Control

Manual Control

When uploading files you have two options, either upload as a one off job or store in a rudimentary models database. If uploaded as a one off, the file is deleted in completion of the print, if you want to print again you will need to re-upload. Completion means that the print actually finished or if you click the stop button. It is annoying that the stop button also removes the file because I have had to stop prints before because they didn’t stick to the bed and I needed to restart. As R-Server deletes the file I had to re-upload it. Not an arduous task but inconvenient.

The model ‘database’ is a great way of storing items that you may print over and over. If you are running a company printing out repetitive parts – say a printer –  then you can hold all the plates that need printing and copy to the job queue when needed. At the moment the model database is a single directory so everything is listed in one line. If you are making several different types of printer then this could be an issue finding the right model. I have brought this up with the developer and hopefully the next version will have directories.

Another talent of R-Server is that it can control more than one printer. Each machine takes up about 5MB of RAM while printing, so in theory you could have 50 machines hanging off of one 256MB RPi! Whether the processor could deal with that I am not sure though. I have had my two printers running simultaneously and it had no issues.

Overall using Repetier-Server has simplified my workflow and use of my printer. Not only does it mean that I no longer need to have my desktop machine running while printing, I can transfer files simply (and while the printer is working) and monitor its progress on any networked machine.

3 Comments

Filed under Reviews

DSF Build Progress Nine

First to forth test prints

First to forth test prints

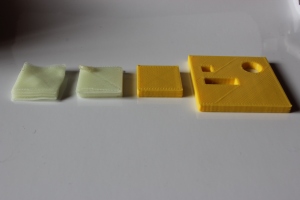
I have put the E3D hotend together (really easy to do if you follow their instructions) and installed it on the printer. Since then I started to do some test prints. I started with a 20x20x4mm piece. The extruder worked brilliantly however the printer had an issue, the Y axis kept offsetting (see first print above – ignore the waviness, I was impatient and pulled it off the bed while it was still hot). I turned up the power of the Y Axis stepper driver (second print). Same issue, again ignore the blob that was my fault. The Y Axis is quite heavy and I thought that the stepper was still missing steps. The stepper for the extruder has a slightly higher torque so I wanted to swap it for the Y Axis motor.

I removed the extruder motor and then started on the Y Axis. As I removed the motor I noticed that the pulley came off too easily. Oops I forgot to put the screw to clamp it to the motors shaft! So what I think was happening was the motor turned but didn’t have the grip on the pulley to move the mass of the bed. I finished the pulley with the nut and bolt and reattached the two motors. Voilà, it worked correctly as shown in the third and forth prints above.

X Axis pulley slip visible on the left print

X Axis pulley slip visible on the left print

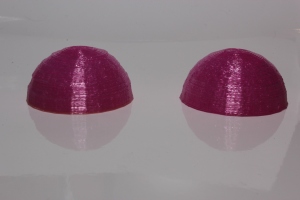
While I was writing this I was printing out a 40mm dome. It finished printing and a similar thing was happening to the X Axis. It isn’t visible on the above prints as they didn’t go high enough for it to manifest. A new pulley was printed on my Huxley as the old one wouldn’t take the captured nut correctly. As you can see above there was some significant slippage although not as severe as the Y Axis had.

PID Tuning

PID Tuning

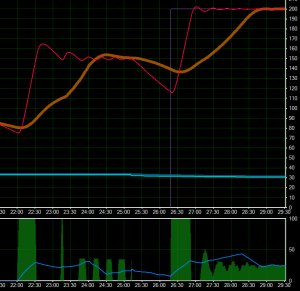
The last thing, which should have been the first, I wanted to do was to do a bit of PID tuning for the hotend. Using the auto PID command M303 in Marling I was able to set the PID to: P 26.84, I 2.48, D 72.57 should anyone be interested in using them as a base for their E3D hotend.

Glowy

Glowy

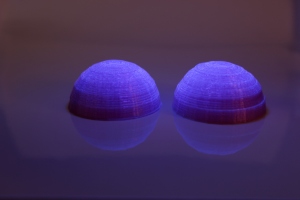
Just in case anyone is wondering the domes were made with Faberdashery’s Aurora UV colour changing filament.

Leave a comment

Filed under DSF

E3D Hotend Arrival

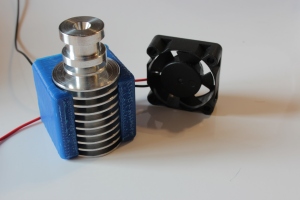
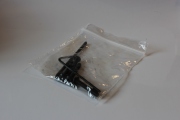
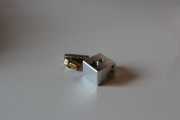
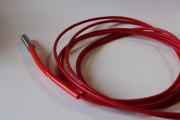
My E3D hotend turned up today. Here are some pictures of it before I get to building it! One comment, I like that they have included the allen (hex) keys to make it easier to put together.

IMG_2808

Hotend and fan

IMG_2812

Thermistor, wiring, kapton tape

IMG_2811

Screws and tools

IMG_2810

Heater block, nozzle and connector

IMG_2809

Heater cartridge

Leave a comment

Filed under Uncategorized

Quick Post

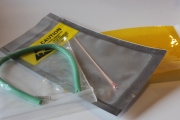
packageJust had an email to say that the hotend, from E3D, for my printer has been posted! On holiday this week so should be able to get the printer finally up and running!

Leave a comment

Filed under DSF

DSF Build Progress Eight

image

Almost there!

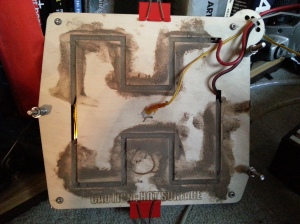
The heated bed is now complete! In my last update I was having issues with temperature readings. It turns out that the problem was the ply I used as an insulator. I cut the ply with a route for the nichrome wire to channel in and in the center is the thermistor. Because of the shape, a H shape, the ply had a defect that made the center bend away from the aluminium. As it done so it moved the thermistor away from the aluminium corrupting the reading. Also the nichrome wire was moving away from the bed causing hotspots where it burnt through the kapton tape.

Fire cemented

Fire cemented – little bit on the left is waiting to be filled, it is where the cramp was holding the H section tight to the aluminium.

To solve both these problems I used fire cement to fill the grove with the nichrome wire firmly attached. This means that now the heating wire is secure and the ply is held in position.

For the print surface I am using glass but it is borosilicate glass, from RepRapWorld.com. This glass apparently has a lower thermal expansion which, I believe, should reduce the likelihood of shattering due thermal shock. Given the low rates of heating and cooling I don’t think it would be likely occurrence, however I was ordering filament from them and it saves me getting glass cut to the right size and lets be honest “borosilicate” sounds cool!

All I am waiting on now is the hotend from E3D before I have a fully working system. It was a four week waiting time, although it may be here earlier according to the thread in RepRap’s forums.

Leave a comment

Filed under DSF

DSF Build Progress Seven

image

I have been surprised that the heated bed proved to be much more interesting then it would initially seemed. First I had to decide the method of heating – PCB or nichrome wire. At work we have a RepRapPro Mendel which uses a PCB heater. It’s fine but takes ages (up to 7 minutes) to reach temperature. My eMaker Huxley uses nichrome and take moments in comparison (2-3 minutes). Now obviously I have to account for the differing bed size, Mendel at 200mm square and the Huxley at 140mm. That’s a 35% difference in size which isn’t reflected in the times so there is more going on. My unscientific opinion is that I have much less nichrome wire length where the PCB has a long track to give its resistance. Bear in mind I was always taught that heating on PCBs was a bad thing! Due to this the nichrome is able to heat to a higher temperature per mm of wire than the PCB thus able to heat much more rapidly. So that is my long winded way of saying I went for nichrome for the DSF.

By no means is nichrome without its problems. It generally comes with no insulation, not many plastics can withstand the 1000’s of Celsius nicrhome can reach, so shorting on the bed is a consideration. I believe you can get it in a glassfiber but I have yet to find that in the UK. Connecting to it is another issue. You really shouldn’t solder to it, at least not with normal tin/lead solder (it would probably be hot enough to melt it).

So each problem in turn. Insulation has been provided by kapton tape. It can withstand the temperatures the wire should reach and still insulate it from the aluminium bed. To help guide the wire I designed the heat shield with a channel that allows the wire to run in a fixed pattern around the bed. This ensures that there should be reasonable heat coverage over the bed, you are never more than 25mm from it. I then covered the bed in a double layer of kapton tape where the wire will run. That completed the wire was then routed and taped down with kapton again. The connection between the 15A supply cable and the nichrome wire is taken care of with a couple of ferrules. These allow for a solid connection without solder. The supply cable was then routed through the heat shield and a cable tied used to provide strain relief.

The bed thermistor was attached and routed as well and the whole assembly wired up to the Megatronics board. I am always cautious when turning on a greater for the first time. Initially I set the temperature to get to 35C. I monitored the rise in both Repetier-Server and using an infrared thermometer. This is where I discovered something disconcerting.

The bed rose in temperature and settled at the set temperature in Repetier-Server. The infrared thermometer told a different story. It showed the temperature rocket to about 44C before settling down to 40C, 5C more than was set and what Repetier-Server was reporting. The same is true for most temperatures, the thermometer shows the temperature shoot way above the target, sometimes by 10-12C and then settle at about 5-6C above what the electronics see. I have asked for help on the RepRap forums so will see if anyone else has an idea. My current thought is that it is the temperature tables in Marlin, if so then I will need to figure out how I change it.

A safety feature on most beds is having them mounted on springs so that if there is a problem, say with a print curling, then the bed can move out of the way of the hotend. That leads to a question, how much ‘spring’ do I need? What does the spring need to support: the heat shield, aluminium bed, glass and what ever is being printed. Without the print my bed weighs in at a good 780g, adding a theoretical print of about 200g that means I need to support around 1Kg. I found a site, Lee Spring, which supplies all manor of springs. The factors to take into consideration are: the weight (1Kg), size of bolt holding the base (M5), distance to travel. On Lee Spring the ‘springiness’ of a spring is measured in newtons per millimetre. Thus if you wanted a spring of 1N/mm to move by 2mm you would have to apply 2N of force. 1N is equivalent of  about 102g. Something else to consider is that my design has 2 springs on one side and one on the other. The weight is split half way per side so the double spring side has about 500g split between the two springs, whereas the single spring has to take the whole 500 itself. I chose the LCM080DG 02 M as it fires the size I needed and has a compression of 1.5N/mm. As the springs will be compressed about 3mm anyway there is enough resistance to hold the rest of the bed up.

Leave a comment

Filed under DSF

3D Printing – Getting What You Need Now

From need to product in less than one hour

From need to product in less than one hour

When people find out that I have a 3D printer the question that I am often asked is ‘why do you own one?’. Usually I tell them that it started as a hobby and to be able to make my own cases for my electronics projects (I have never been very good at buying a box and making it look good by drilling out holes etc!). However over the couple of years I have now owned a 3D Printer for I have evolved that thought. It was personified yesterday while I was cleaning my desk at home…

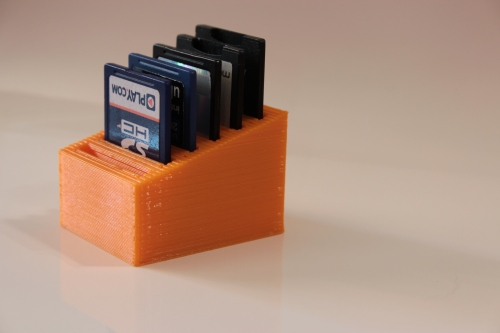
Yes, I am untidy! My desk often looks like an explosion at some weird combination engineering, computer and plastics factory. On the odd occasion even I get miffed and have a tidy up. While I was cleaning I kept finding SD cards. Having got loads for my camera and RapsberryPi, I needed a way to store them tidily and I turned to the ‘net. Sure I could have brought any number of card cases, but then I looked over at my Huxley which I was sure was bouncing there shouting “USE ME YOU IMBECILE!”. So I hit up Thingiverse and found a parametric SD card holder. Perfect for my needs. I got the Huxley up and running while I carried on cleaning. 30 minutes later it was printed and I was able to store my cards nice and neatly.

So now when I am asked why I own a 3D printer I’ll tell them that story. After all it would have cost me much more to buy a holder that probably wouldn’t have fitted my needs so well and it would have taken me days to receive it. As it stands the print cost me about £1 and took no more than an hour from investigation to final product.

Parametric SD Card Holder

Leave a comment

Filed under Musings

Setting Up Megatronics

Steps per mm

Possibly the most exciting thing for me when building a 3D printer is the electronics. I have built 2 kits (a Huxley from eMaker and a Mendel from RepRapPro) and am now building my own design. Until any printer gets attached to its electronics it is a mere metal doorstop. What I wanted to write up about was how I calculated the steps per millimetre for the DSF.

While in my usual ‘I’m bored lets search the net’ mood, I stumbled across the excellent RepRap Calculator3  by Josef Prusa. If you are building a printer from scratch this will greatly simplify figuring out what number the steps per millimetres should be.

Like many of the printers out there my DSF uses belts for the X and Y axis’ (T5) and a lead screw for the Z (M5). For the belt drives all I needed to change was the belt preset to 5mm – or the T5 belt. The pulley I was using was already 8 teeth and 1/16th stepping. As a result this would give me 80 steps per millimetre or a 0.0125mm resolution.

The Z axis uses an M5 threaded rod as its drive so again all I needed to change was the preset to M5. This means a step of 4000 steps per millimetre or 0.00025mm resolution. Obviously that is much finer then any of the prints I would ever do, the finest I have done was 0.1mm/layer. In reality I could set the stepper to full steps and still retain a resolution of 0.004mm.

So thanks to the calculators I have a 80 steps/mm for X and Y and 4000 for Z. Ignore the 800 for the extruder above. I have not yet got an extruder so that is just place holding!

One last thing; I have limited the feedrate of the Z axis to a low 2mm per second. Any faster and the motors stall. I need to oil the threaded rod to try and get some extra speed out of it, but I am not holding my breath.

Leave a comment

Filed under DSF, Musings

DSF Build Progress Six

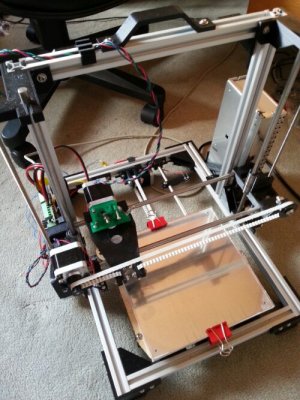
So I have got the steppers installed, the electronics and endstops. Now all that was needed was to test it all together. Connection to the computer was successful and the machine came to life! The Z Axis homed the wrong way, but an update to the Marlin firmware solved this.

Leave a comment

Filed under DSF

Simple Cooling Fan for RepRapPro Mendel

Simple but very effective

At the school I work at we have a RRP Mendel. I was trying to print some students work but it kept failing. Eventually I discovered that the problem was down to curling from some overhangs on one piece. As the part had 45degree angle and only 5mm thick, the printer was catching on the curled ands and eventually cause the printer to miss some steps. I needed a way of cooling the plastic faster.

I then found an 80mm computer case fan that was being recycled. As I needed to get the part printed I simply cable-tied the fan onto the smooth rods of the X-Axis. Amazingly these are about 80mm apart and the fan fitted beautifully behind the X-Axis endstop. Now I was able to get the print to finish and have a great look as well.

Leave a comment

Filed under Musings